Frugal Woodworking

Woodworking Tips for Affordable Woodworking

Category : Tools

Best woodshop pencil

It is always a frugal win to celebrate when the best in class, is also the least expensive solution.

Here is a very strong review for the inexpensive PaperMate Sharpwriter mechanical pencil.

See the full review: Best woodworking pencil.

The underdog goes up against a fan favorite, and wins.

<

Dovetail Kit for under $30

If you know someone that wants to get into making handmade dovetails, this is a list of tools that would allow them to cut great dovetails without spending a fortune.  Notice I didn’t say this was a beginner kit.  The tools in this kit are good enough that they could be used for years without complaints.

Workholding is an issue with dovetailing.  A very effective method of face vise clamping is to use a pair of hand screw clamps and a pair of F-clamps

<

Bad Blade Carver, So Good

Bad Blade Carver by Kwik Tool

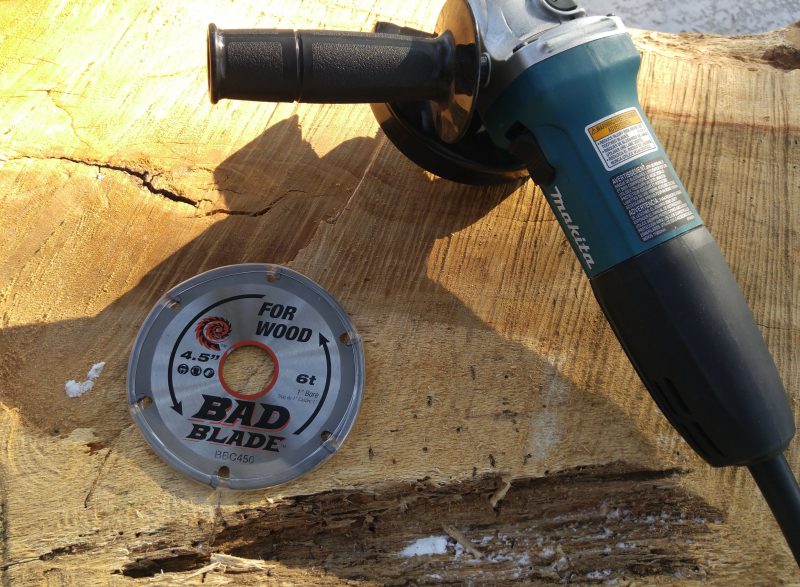
For under $20 I am very impressed with the Bad Blade Carver by Kwik Tool.  Mounted in a 4.5″ grinder, it removes a ton of material quickly yet allows a fair amount of control.  The disk has only 6 teeth so the carver is mainly a solid disk with very few teeth to bite and create kick-back or dig-in. I found I had the best control when engaging the blade between 12 o’clock (top of the grinder) and 3 o’clock. When in that range it was not overly aggressive and left me in control.

This carving blade competes with

  • King Arthur’s Lancelot Chain carver  – The Bad Blade Carver is half the price and has pretty much identical capabilities.  Both leave very similar surfaces. The simpler design of the Bad Blade make it more reliable and less scary.
  • Arbortech Tuff Cut – Nearly identical in design to the Bad Blade Carver.  The Tuff Cut has only three teeth. Half the number of teeth means the Bad Blade wins for a smoother finish AND is 1/4 the price.
  • Arbortech Turbo Plane – The turbo plane is more than 7 times the cost of the Bad Blade Carver, however The turbo plane is kind of a more refined animal.  It probably isn’t fair to compare the two. The Turbo Plane leaves a better finish and can be used in a different way,  but for bulk removal and heavy shaping, I think the Bad Blade Carver wins. If you want the scalloped and smooth surface, then the Turbo Plane wins.
  • Kutzall Shaping Disc  – The Bad Blade Carver compares closest to the Kutzall coarse.  The Kutzall leaves a little better finish , but is a touch slower at bulk removal (that could be  pro or con) than the Bad Blade Carver.


Bad Blade Carver ready to woodwork

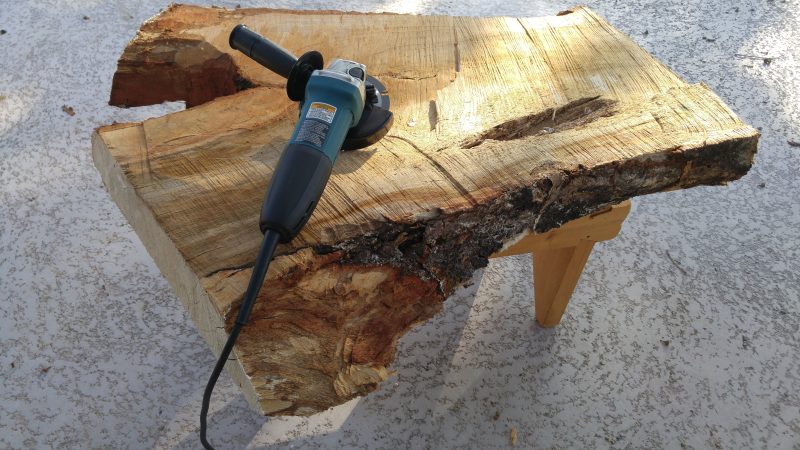
Before Bad Blade Carver. This is straight off the chainsaw.


Bad Blade Carver review

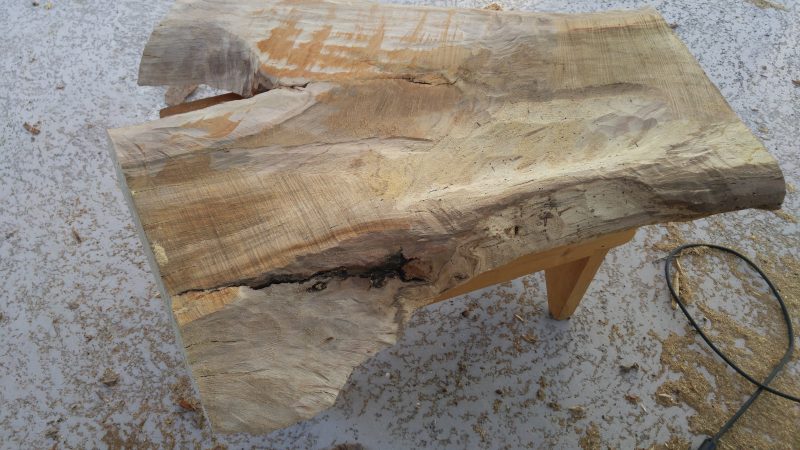
This is not fully sculpted yet, but you can see that the Bad Blade Carver has been very effective at sculpting, shaping, bark removal, and smoothing

I am super happy with the Bad Blad Carver.  It does what I need it to do (removing and shaping wood) and does it in a fairly safe and controllable way.  I choose it above the other four products I referenced above.

<

Rasp Alternative

Shawn Graham at wortheffort.com has a great tip for making an inexpensive alternative to a rasp.  Good rasps are kind of pricey, but with a scrap of wood, some spray glue and a sandpaper he shows you how to make a simple yet effective shaping tool.


Shawn’s videos are wealth of information, both academic and practical.  His explanations are top notch.

<

Make Small detail carving chisels

I really enjoyed this series from Patrick Sullivan. He shows step-by-step how to make some simple but very useful carving chisels. He has great explanations, supporting camera work and solid methods. Most importantly, he does it without expensive bells and whistles yet cuts no corners on quality. Very affordable.

<

Woodglue Brushes

Silicon brush for woodworking glue

Silicon brush for woodworking glue

When glueing up projects I use the frugal method of using old credit cards, or hotel room cards as disposable glue spreaders. They work great for larger areas and edges. They don’t work so good on irregular surfaces or dovetails.
I was eyeing the fancy silicon glue brushes that are specifically for woodworking and laughed when I realized it looked like the one I use for my barbecue. The grilling brush has way too long a handle, but it occurred to me there are probably smaller varieties for the kitchen.
There are and they are considerably cheaper. I found a pair of glue brushes on Amazon for less than half the price of a singles dedicated glue brush. I tested them out on a recent gluing and they work well for spreading glue and getting it into dovetails and mortises. When you are done you can either run the brush underwater to clean it or wait until the glue dries the pluck it off the bristles with a few easy pulls. The glue comes right off the silicone bristles.
The bristles were a bit long so I trimmed off a 1/4″with a scissor.
For a frugal paint cup to dip the brush into, I use old plastic lids from peanut jars, pickle lids or similar. I put a rolled piece of painter tape under the lid to keep it from sliding around while I use it.

<

Super clamps for panel glue-ups

These clamps are awesome. They are simple to make and cost less than $10 for a pair. For panel or tabletop glue-ups they hold your boards together and they hold them flat. No store bought clamps can beat them for gluing panels or tables.

Parts list for a pair of 48″ clamps:

  • 1 2″x4″x8′ Cut it into 4′ lengths (or however long you need them). Rip them down the middle of the 4″ dimension.
  • 4 bolts that are roughly 6″ long and 3/8″ in diameter. They should have an un-threaded section no longer than the thickness of of the two pieces you ripped to make the two halves of the clamp. (~3 1/4 “)
  • 8 matching washers
  • 4 matching wing-nuts


Thanks to Sergio Acuña Padin for producing this video and sharing the idea.

<

Effective Marking Gauge for Under a Dollar

Paul Sellers brings this great video for how to make a marking gauge for under $1.  It is simple to make, yet brings a high degree of precision for marking dovetails and dado depths.

Tools needed:

  • saw
  • drill
  • screwdriver
  • sandpaper
  • file
  • chisel

Materials:

  • 1 steel flat-head screw 1 to 2″ long. Preferably slotted, rather than Phillips or square drive.
  • 1 scrap of wood roughly the size of a can of tuna-fish.

Watch Paul show you how its done without spending money on fancier marking gauges, beading tool, or scratch stock.  The simplicity is awesome, and so is the realization that this can be fine tuned more than any of the expensive marking gauges available for purchase.

And here is a short follow-up video where Paul addresses even more that can be done with his simple beading tool.

<

Practical Woodworking Guru

A practical woodworker uses what is efficient in both time, effort, and money.  I have really been enjoying the training videos offered by Paul Sellers.  He is not promoting the fanciest new tool and he promotes methods that give you the most impact for your effort and money.  Try out some of Paul Sellers videos and I guarantee he will pass on some practical knowledge that will save you time and money.

<

Inexpensive Versatile Wood File

A laminate file is not just for plastic anymore.  They have a lot of attractive features for woodworkers.

A laminate file is not just for plastic anymore. They have a lot of attractive features for woodworkers.

A wood file, or several of them in various sizes, is handy to use.  Often times a metal file that has grown too dull for metal work can still serve out a nice lifetime as a wood file.  In case you are looking to have a new file that works well in several situations, Robert Lang at Popular Woodworking has posted a nice article about using a common “plastic laminate file” as a wood file.  He is right on target from the frugal woodworking side of things.  The plastic laminate file is:

  • affordable
  • has a coarse side
  • has a fine side
  • 1 safe edge – so you can file up against an edge (like a tenon shoulder) without damaging the adjacent face
  • a molded  handle (as opposed to a tang that you have to purchase or make a handle for)
  • a hole for hanging
  • Of a length that is long enough to be effective.  (Use long strokes, just like when using a hand saw.)

None of the woodworking stores seem to carry them.  You can find laminate files at Amazon or Bob recommends looking in the big box stores back by where the sheets of laminate are held.


<

Kerfmaker from Scrap Wood

This idea is just too simple.  A custom kerfmaker for use on a tablesaw that costs next to nothing and takes only a minute to make.  The end result is a Kerfmaker that is every bit as accurate as the more expensive version.

Don’t get me wrong!  The original Kerfmaker from Bridge City Tools is quite brilliant, and would pay for itself in both accuracy and time savings if you made a living making furniture.  However for the hobbyist, it can seem a little pricey.   LumberJock Rance has a great approach to this that I will use when I need it.  My fear is I will not remember how, when I need it, so I am posting it here for easy access.

Disposable Kerf Maker

It uses only two things. :

  1. Two scraps of wood
  2. Two pieces of double sided tape
<

Inexpensive push blocks

Push blocks are a safety feature that are recommended on jointers, router tables, shapers and table saws.  They keep your hands away from danger and give you a solid hold on your workpiece.  This tip on Lumberjocks is a great one for using rubber grout floats as inexpensive push blocks.  For a few bucks a piece they are secure and consistent.

grout float push block

<

Dovetail Razor Saw Review

It’s hard to believe you can get a new dovetail saw with great performance for under $10 but the little razor saw from Zona Tools is getting a great reputation.  Here is a great review of the Zona Razor Saw that compares it stroke by stroke with other dovetail saws.  Accurate and precise cuts with a micro kerf seem to be its strong points.

<

Thin Kerf Rip Blade for under $20

This review appears on Lumberjocks for a Freud  Diablo Demo Demon D0724DK 7-1/4″ 24T circular saw blade, but used in a table saw.  It is only a 7-1/4″ blade so it has a limited height, but the 1/16″ thin kerf and smooth cut seem to be perfect for ripping up to 1″ stock.  This blade sells for around $15 which is a fraction of what other thin kerf table saw blades typically cost.

You can read the review here and buy them on Amazon.

Freud Diablo Demo Demon as a rip blade

Freud Diablo Demo Demon as a table saw rip blade

<

Sharpening Works and Won’t Break the Bank

This website has been around a long time.   It is a little tough to navigate, but it is worth digging through.  It has a wealth of sharpening wisdom based on actual measured results rather than folk-lore.  Aside from all the great information, there are tips and jigs which end up saving a lot of money and the recommendations for sharpening abrasives are very affordable.

www3.telus.net/BrentBeach/Sharpen/index.html

I like his suggestion of using a Norton Crystolon Bench Stone for grinding the bevel.  They are fast, inexpensive and stable.  The 11-1/2″ length allows for longer , more effective strokes. His recommendation for using 3M Imperial sandpaper for final sharpening is good and cost effective.

<